SQL Console
General Description
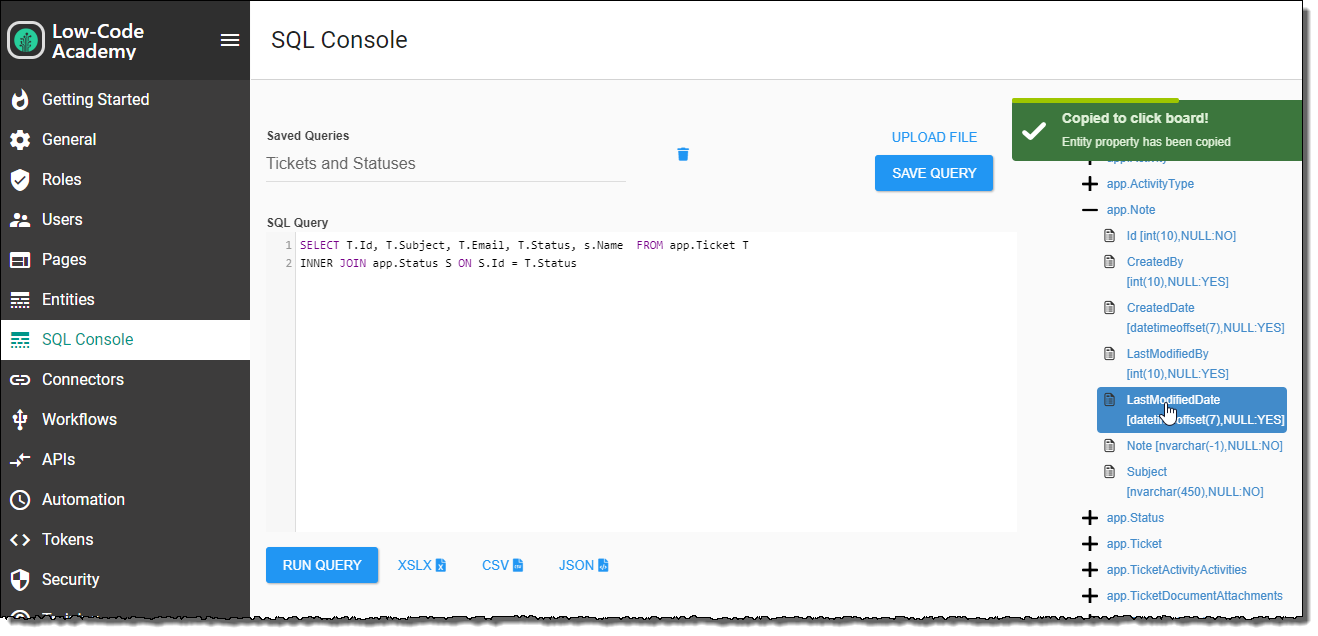
The SQL Console allows the Low-Code Engineer and Citizen Developer roles to access the database in a quick and easy location. It can be used for preparing and testing SQL statements for tokens, dropdown data sources, grid data sources, and other places where SQL queries are needed. The results of the statement, if any, are shown directly below the query input and may also be exported to Excel, CSV, and JSON. Queries can be saved and are available in a dropdown for anyone with access to the console to run. The console also allows you to see the Tables and Columns that have been created by the Plant an App Entity builder so you can easily see your app’s schema.
The SQL Console is disabled by default. As a security precaution, in order to see and use the console, it must first be enabled in Plant an App General Settings from the Configuration page. The user enabling the feature must be in either the Admins or Administrators roles or a SuperUser. See below for more details.
Permissions
When dealing with being able to directly query the application database, security is of great concern. By default the SQL Console is disabled. Once enabled, access to it is limited to specific Roles. Below is a permissions grid that shows which roles can see or use the Console.
| Role | Can Enable | View | Run Queries |
|---|---|---|---|
| Admins | ✓ | ✓ | |
| Citizen Developers | ✓ | ✓ | |
| Low-Code Engineer | ✓ | ✓ | |
| Administrators | ✓ | ✓ | ✓ |
| Super Users | ✓ | ✓ | ✓ |
| All other roles |
Enabling/Disabling SQL Console
To Enable or Disable the SQL Console you must be logged in as a user who has one of the roles with a check in the Can Enable column in the grid above. Once logged in as a user with the correct permission, follow these steps:
- Navigate to Plant an App Configuration
- Select General in the left column
- Locate the Enable/Disable SQL Console toggle button and toggle it on
- Click Save in the upper right corner of the page
- The page will refresh and SQL Console will now be available in the left column
To disable the console, follow the same steps, toggling the button off in step 3.
The Plant an App built-in role Admins, since they can enable the feature, can see the console in Plant an App configuration, but they cannot use it as the buttons are disabled for them. The idea is that an admin is responsible for general management of the system, but they aren’t developing an application.
Saved queries are not lost when disabling. If the SQL Console is Disabled after users have saved queries, if it is subsequently Enabled, the save queries will still be available in the Saved Queries dropdown.
Using the SQL Console
To use the SQL Console you must be logged in as a user who has one of the roles with a check in the Run Queries column in the grid above.
Run a Query
- Navigate to Plant an App Configuration
- Select SQL Console in the left column (if you don't see this option, please see Enabling/Disabling SQL Console above)
- Enter a Query in the SQL Query text box. A simple query to begin with is:
SELECT UserID, UserName, FirstName, LastName, Email, DisplayName FROM Users - Click the Run Query button below the query text box
- The results, if any, will be shown below.
If your query returned any error it will be shown at the bottom of the page in a red box with white text.

Download Results
The results of queries can also be downloaded in a file. The user has a choice of XLSX (MS Excel Open XML Spreadsheet), CSV (comma-separated values), or JSON (JavaScript Object Notation). These buttons are located to the right of the Run Query button. The query does not need to be executed first before clicking a file button as it is executed when a file button is clicked. Depending on your browser settings, you will either be prompted whether to open or download the file, or it will be opened or downloaded automatically.
Upload a Query
If you use another application such as SSMS to compose your query, you can save the query to a text file and upload it to the SQL Console using the Upload File button. As soon as you upload the file, the contents of the file will be loaded into the SQL Query text box.
For security reasons, the file must be a .txt file. So if you are copying a file saved as .sql, all you have to do is just convert it to .txt first.
Save a Query
If the query you have loaded in the SQL Query text box will be useful again in the future, you can save it. Once saved, a query is available in the Saved Queries dropdown for all users who have Run Query permission. To save a query follow these steps:
- Enter a query in the SQL Query text box either by typing it, uploading it, or loading it from the options available in the Saved Queries dropdown.
- Click the Save Query button in the upper right corner above the text box.
- If this is a query you typed or uploaded, the New Query option will be selected by default in the pop-up.
- If you want to update an already saved query, select Update Existing Query. Then select the query you wish to update from the Existing Query dropdown.
- Otherwise, type the name you wish to assign to the query in the Name field.
- If this is a query that was loaded from the Saved Queries dropdown, the Update Existing Query option will be selected by default and the query name will already be loaded in the Existing Query dropdown.
- If you have made edits to the query and want to save it as a new query, select the New Query option and enter a name for it in the Name field.
- Otherwise, you can just click Save to save your changes and replace the previously saved query.
Load a Saved Query
If you or any other user has saved queries in the SQL Console, they will be available in the Saved Queries dropdown. Simply select the query from the dropdown and it will be loaded automatically in the SQL Query text box. Then all you need to do is click Run Query or one of the file download options.
Browsing Your Application Tables
The SQL Console also allows you to view your application tables. These are the tables associated with Plant an App built-in Entities and tables that were created by the Entity builder. These also include the relation tables created when a List of Entities property relation is configured between two Entities.
Under the Available Entities heading on the right side of the page, you will see all your application tables listed. This listing has the following features:
- Click the Plus symbol next to any table name to expand it and see the column names and data types for each Entity property.
- Click any node of the tree to copy that value to your clipboard to help with precision and speeding up the process of creating queries.
Relation tables can be identified by their longer names that follow this naming convention:
app.[ParentEntitySingularName][ChildEntitySingularName][ParentEntityRelationProperty]
When expanding a relation table, you will see two columns that follow this naming convention:
[ParentEntitySingularName]Id and [ChildEntitySingularName]Id