Overview
Audience: Citizen devs
System/Security AdministratorsSkill Prerequisites:
System Administration and Maintenance
APIs and Endpoints
An API (Application Programming Interface) is a software medium that allows two applications to communicate with each other and exchange data through a common language (or protocol).
An API allows access to functions or data of an application remotely, usually from another application, through a standard application interface. A request is sent to the target software in a universal language.
The API language allows the software called upon to understand what is being requested, then to carry out the actions and deliver the requested content. When an API requests information from a web application or web server for example, it will receive a response.
The place that APIs send requests and where the resource lives, is called an Endpoint. As such, an API Endpoint is one end of a communication channel. If an API is a set of rules that allow two applications to communicate and share resources, the Endpoints are the addresses or locations of the said resources.
Plant an App APIs
Plant an App allows for a highly customizable and detailed API Endpoint configuration that will enable your app to leverage the full power of APIs. The following guide will provide you with the required information regarding API Endpoint configuration on our platform.
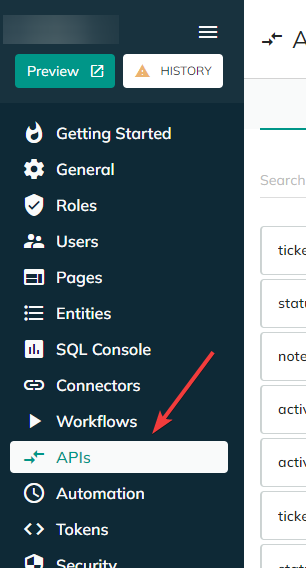
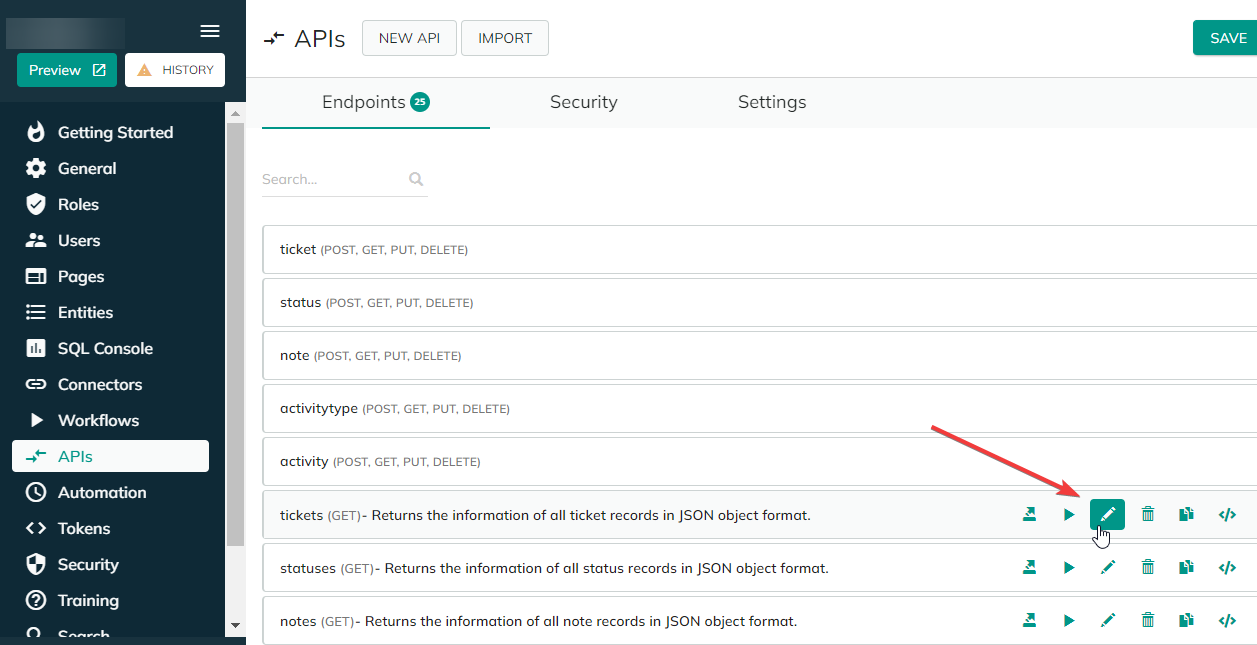
To configure your API Endpoints, access the APIs section on the left-side menu.
- If you already created an Endpoint and you want to edit its configuration, click the
Edit this Endpointbutton.
- If you have no existing Endpoints configured, click on the
LET’S DO IT!button, or theNEW APIbutton.

The following screen is the Endpoint’s configuration section that will allow you to define its basic Settings, its Input Parameters, Actions to be performed when the API is called, the way it behaves if it encounters an Error and its Security configuration.
It also provides you with the possibility to Cancel, Save or Save & Test your configuration at any time via the buttons in the upper right section of the screen.

Note that any changes you make to your Endpoint configuration will only take effect after clicking the Save or Save & Test buttons.
1. Settings
These are the basic settings of your API Endpoint.
- Endpoint name
This is the name of the object or resource you wish to expose with the API. This name is also used as part of the URL to identify this endpoint. It is recommended to avoid using any whitespaces in this field.
- HTTP Method
Your API will use “HTTP methods” or “calls” to communicate. These are the request types passed by your Plant an App API to indicate the desired action to be performed on the remote resource.
You can read more about the basic HTTP methods here. For an extensive list of available HTTP request methods, please see here (advanced).
The HTTP method as well as the URL used to identify this endpoint is always displayed on the upper right of the Configuration page.
- Description
A free text field that allows you to provide a reference about what your API does.
- Debug mode
A useful option to debug your Endpoint. Enabling this option will log detailed information about the calls to the API. Toggle this option only when debugging, as detailed logs can grow big, fast.
- Is Enabled
Enables or disables the Endpoint object.
- Cache Response
This option allows the standard responses to be cached (kept in memory), making the response immediately sent instead of running the actions every time. If you tick this option, you will also need to provide the amount of time (in seconds) for a response to be kept in cache.
Use this option if the data you request does not change often.
- Improved validation response
This option will enable the use the new response scheme for input validation errors (when the data provided does not match the required format). When a validation error occurs, it will have a better structure and provide more detailed information.
Comes enabled by default. Disable if specifically needed or required.
2. Input Parameters
Some API requests take input parameters - this is where you list those parameters that need to be provided into the API call. These parameters pass needed information to the API to enable it to perform its function and will vary on a case-by-case. In simple terms, the input parameters are pieces of information to be presented by the API to the application it communicates with. For example, some applications will require specific mandatory fields (such as the name of the required resource, in a predefined format) that the API needs to provide in order to run.
There are two input formats that you can define: Text and Number. To add a new input parameter, simply click the ADD PARAMETER button and choose its format. You can add multiple input parameters to your endpoint configuration.
Each input parameter supports a Validation system with a Condition and Validation rules.
You can remove an input parameter by clicking the Bin button on the upper right corner of its configuration panel; note that you will also need to click the Save (upper right corner of the window) button for the change to take effect.
3. Actions
This section defines the actions that will get executed when the API is called. Three options are available:
This section defines the actions that will run when an error occurs during the API execution. Three options are available:
ADD (add a specific action)
IMPORT (import a predefined action)
ADD RESPONSE (add a response)
- The
ADDbutton offers a wide array of Actions that can be undertaken by your API. Please see the full Action list that are available.
After choosing the desired action, you will be able to configure them in detail - provide a description, a specific error message to be displayed, an execution condition via a Boolean expression as well as specific parameters for each type of action. An advanced guide for setting up the various Actions described above in detail is available on the Plant an App documentation portal.
- The
IMPORTbutton will allow you to import a predefined action written in the JSON format. Click it and paste or write the action in the field that pops-up. - The
ADD RESPONSEbutton enables you to define responses to your API’s actions. Three options are presented:- Output – type of actions that will output result; available outputs are JSON (list or object), a file download based on your identifier or raw response (unformatted). Please see here for a full list and supported parameters for the Output actions.
- Flow – stop the execution.
- Redirect – use redirect (a forward from one URL address to a new one) actions; redirect to a Portal, URL or to a file download are available. Please see here for a full list and supported parameters for the Redirect actions.
You may add as many actions or responses as you want, but keep in mind that some of the actions might be terminal; as such, any actions, or responses found below in the execution order will not get executed. The system will detect any possibly terminal actions and signal them accordingly.

Please check your configuration and modify the action sequence if needed (drag and drop action).
For each of the defined Actions On error, you will be provided with three possible options: Delete (takes effect only upon saving the configuration), Export (under a JSON format), and Clone.
4. On error
This section defines the actions that will run when an error occurs during the API execution. Three options are available:
ADD (add a specific action)
IMPORT (import a predefined action)
ADD RESPONSE (add a response)
- The
ADDbutton offers a wide array of actions that can be undertaken by your API. Please see the full Action list detailed here.
After choosing the desired action, you will be able to configure them in detail - provide a description, a specific error message to be displayed, an execution condition via a Boolean expression as well as specific parameters for each type of action. An advanced guide for setting up the various Actions described above in detail is available on the Plant an App documentation portal, here.
- The
IMPORTbutton will allow you to import a predefined action written in the JSON format. Click it and paste or write the action in the field that pops-up. - The
ADD RESPONSEbutton enables you to define responses to your API’s actions. Three options are presented:- Output – type of actions that will output result; available outputs are JSON (list or object), a file download based on your identifier or raw response (unformatted). Please see here for a full list and supported parameters for the Output actions.
- Flow – stop the execution.
- Redirect – use redirect (a forward from one URL address to a new one) actions; redirect to a Portal, URL or to a file download are available. Please see here for a full list and supported parameters for the Redirect actions.
You may add as many actions or responses as you want, but keep in mind that some of the actions might be terminal; as such, any actions, or responses found below in the execution order will not get executed. The system will detect any possibly terminal actions and signal them accordingly.
5. Security
This section provides you with security settings for your API. There are two settings to define - Cross Domain Policy and Access
- Cross Domain Policy
The cross-domain policy will define the domain(s) where your API will be accessible from. Choose one of the four settings:
| Policy | Description |
|---|---|
| Public | No restrictions (i.e. access from anywhere). |
| Only domains associated with current portal | Access granted to domains linked to the one you are in. |
| All domains registered in this DNN instance | Access will be granted only to domains registered with the present DNN platform installation. |
| Restricted to specific domains | If you choose this option, only allowed domains will be able to access the API; you will need to list them specifically in the “Allowed domains” field that appears. |
- Access
In this section, you will define the access security to the API. There are four options:
| Access | Description |
|---|---|
| Public access | Free access. |
| JWT Access | Access to the API is regulated by a JSON Web Token. If you choose this option, you will also need to define OAuth Scopes (a mechanism in OAuth to limit an application's access to a user's account). You can also Validate the audience of the token. You can find out more about this setting, here. |
| Restricted to API Keys… | This access method needs an API Key to be issued from the APIs section > Security > API KEYS. If multiple keys are issued, you can select them individually. |
| Private (only from ‘Execute API method’ action) | This makes your API private (accessible only locally, invoked without using HTTP). |