Forms - Overview
Forms is a powerful, flexible, secure, fast, and easy-to-use tool that enables the creation of amazing web forms. The web is all about interaction, and web forms are an essential part of that. Forms are created in the Form Builder (see below) and are completely customizable, giving you the power to make any type of form you can imagine - surveys, contact forms, widgets, lead generation forms etc. It takes just minutes to set up even the most complex forms for your website, with no programming and technical experience required.
Stages of Data Load and Execution
Your web Form will be populated with Fields that allow data to be pre-loaded, selected and entered by the user. Although these Fields can be static (i.e. a standard Form), most of the time you will want to create specific types of Forms that can dynamically react in order to suit various needs. For example, you will want to automatically populate a certain Form with specific data and fields in reaction to either a user type, its location or other predefined parameters. These Form "rules" are parsed and data provided during that Form's generation stage.
As such, it is important to understand each of the stages of data load and execution in order to be able to efficiently manipulate the Form's various data fields, determine how they can interact and what interactions are impossible.
Upon clicking or launching the Form, the following steps are loaded in succession:
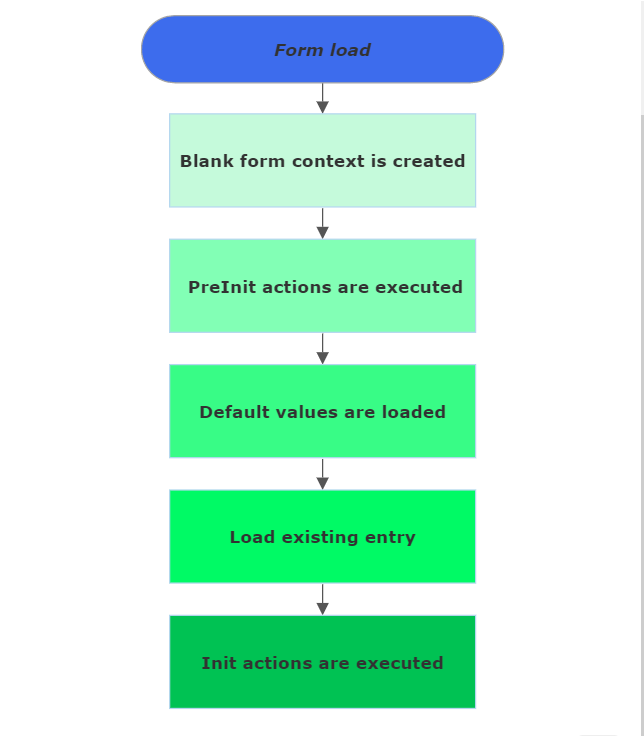
A new blank form context is created This is the first step that take place when the form is first loaded. The context is just a repository where all data lives. Values of the Form Fields are automatically loaded into the context, but you can also load data manually using actions such as
Execute SQLorInject Data(see theActionslist page).PreInitactions are executed These are a stack of actions defined under Form Events section. At this stage, load data into context that you need to use inside the form fields (for example in default values or in the list of values of a dropdown). These actions are defined in the "Events" section of the Form Builder (see the "Events" section on the "Forms: Events" page). Note that data generated by these actions (via contextual tokens) is strictly contextual and will thus not persist, meaning that it is just loaded and displayed and cannot be further manipulated after this stage.Default values are loaded At this stage, the Form Builder injects the Tokens into the context, initializing them with the defined default values. If during the
PreInitphase you’ve loaded data with the same name as a Form Field, it will get overwritten by that Field's default value. If you want that value to persist, move the action in theInitevent (see step #5, below).Load existing entry If a parameter named entry is present in the query string, the
Form Builderwill try to find a matching entry in the internal reports table. If it finds one, it loads its value into the interface, overwriting all values that were computed so far. This is how the theGridintegration works. Also, upon submitting a form, the [_EditUrl] token becomes available, this token contains a link to the submitted entry url, by appending the querystring variable 'entry' (with guid value) to the url of the form page. This token can e.g. be used to email a link to the submission.Initactions are executed This is the final stage of the Form's initialization process. Anything you inject into the context at this point will overwrite existing data - adding an SQL Action and matching its columns to Field names for example. Those are also defined in the "Events" section of the Form Builder (see the "Events" section on the "Forms: Events" page).
Note that data generated by these actions (via contextual tokens) is strictly contextual and will thus not persist, meaning that it is just loaded and displayed and cannot be further manipulated after this stage.
As mentioned above, data that is loaded during the stages above is contextual and cannot be used in tokenized form outside its initial context.
Configuring Plant an App forms - the Form Builder
The main configuration panel for your forms is the Form Builder. It allows you to define what fields to be loaded on your form, their layout, what buttons appear and under what conditions, and access various settings and customization items.
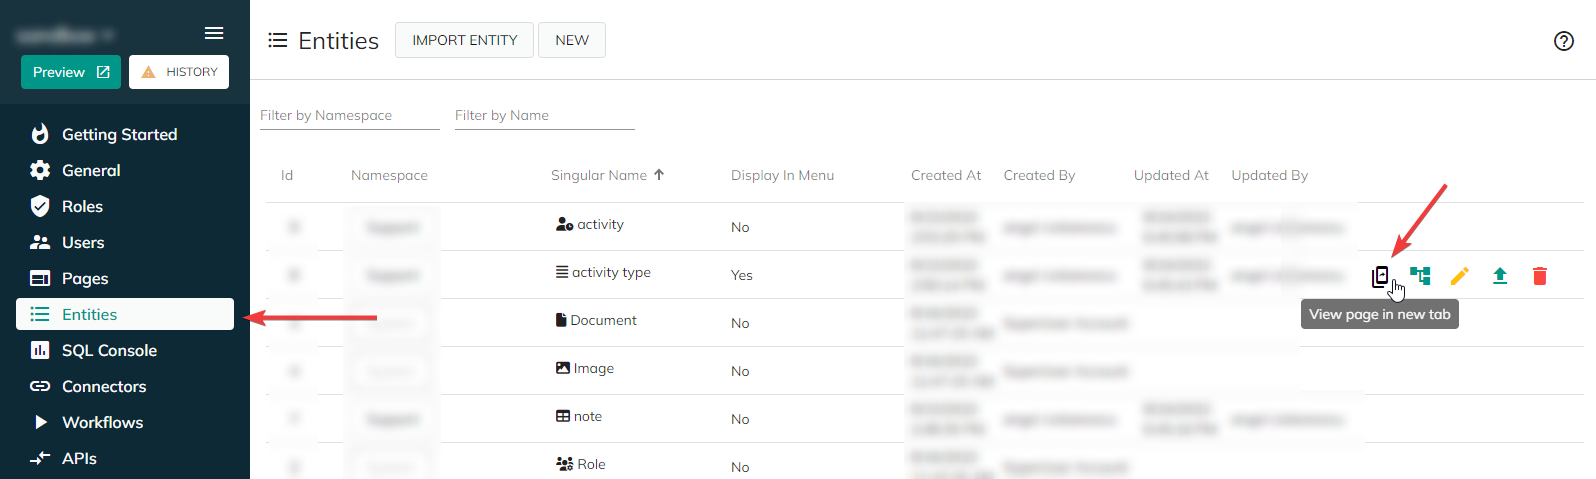
To access the Form Builder, open one of your webpages or entities created under the "Entities" section (please see the Entities section for more information) via the "View Page in new tab" button.
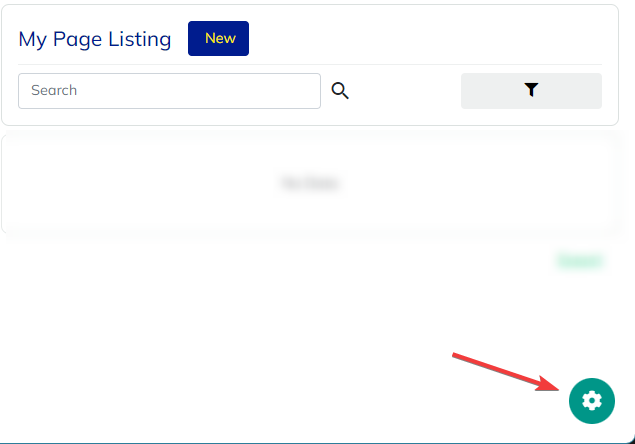
On your web page, click on the "⚙️"(cogwheel) button to open the Page Settings menu...
..and select the "Form" item related to your entity; the naming convention is: "<your entity's name> Form".
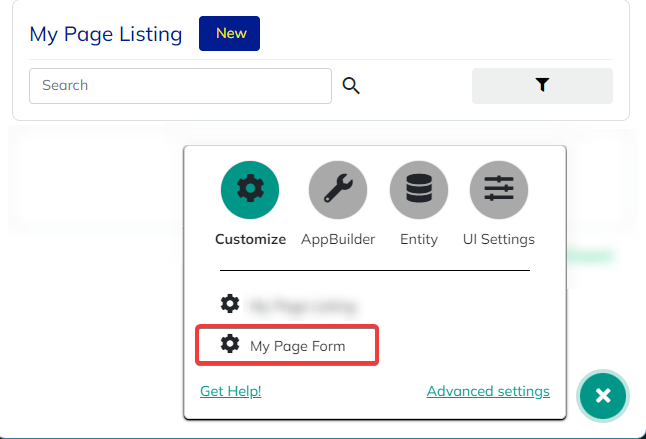
Make sure that you are in the "Customize" section of the Page Settings in order to see your page's Form section. The other categories ("AppBuilder" (Configuration), "Entity" (Entities) and "UI Settings") are documented in their own dedicated sections.
This will open the Form Builder console for this particular entity. The subsequent pages of this section will go through all the items of the configuration within the Form Builder editor.
Form Builder sections
The main sections of the Form Builder are displayed as tab within the editor:

Fields- this section allows you to define the fields to be displayed on your page and their respective data sources, as well as the buttons that will be displayed and their subsequent actions. There are multiple types to choose from. Please see the "Form Fields types and Subtypes" page in this section for detailed information on each.Layout- here you you can manage the display layout of the fields defined in the first tab on the page. Please see the "Layout" section on the "Main Menu and Usage" page for detailed information.Events- define the events that are triggered when the page is loaded\, pre-initialized\, when the form page is submitted\, etc. Please see the "Events" page for detailed information.Settings- contains UI\, compatibility and other advanced settings related to your forms page. Please see the "Form Settings" page in this section for detailed information.
The upper section of the Form Builder also contains miscellaneous control buttons such as:
- The "Form name" field (which is editable).
- The "Form ID" (unique integer identifier preceded "#"), which is very useful for calling each specific Form in scripts, functions or tokens.
- The
Add Fieldbutton (see see the "Form Fields types and Subtypes" page). - The
ExportandImportbuttons (that allow you to import or export forms in a JSON format). - The
Savebutton (which only becomes active when changes have been made to the form). - The
Backand "X" (Close) buttons (which both have a similar effect), as well as the "🗘" (Refresh) button.

After you Save your changes, make sure that you also hit the "🗘" (Refresh) button to be able to see them in the Form you've created/modified.
Back to the top ⤴