Using MEO
Audience: Citizen devs
System/Security AdministratorsSkill Prerequisites:
System Administration and Maintenance
Once the Multi-Environment Orchestrator server has been installed and configured as per the previous sections, you can start using the Version Control feature in Plant an App. The section below will describe how.
Connection
Once the MEO server is installed as described in the section above, you will be able to access and use the Version Control section.
At the first-time use of Version Control, you will need to link your Plant an App to your MEO (Multi-Environment Orchestrator) server.
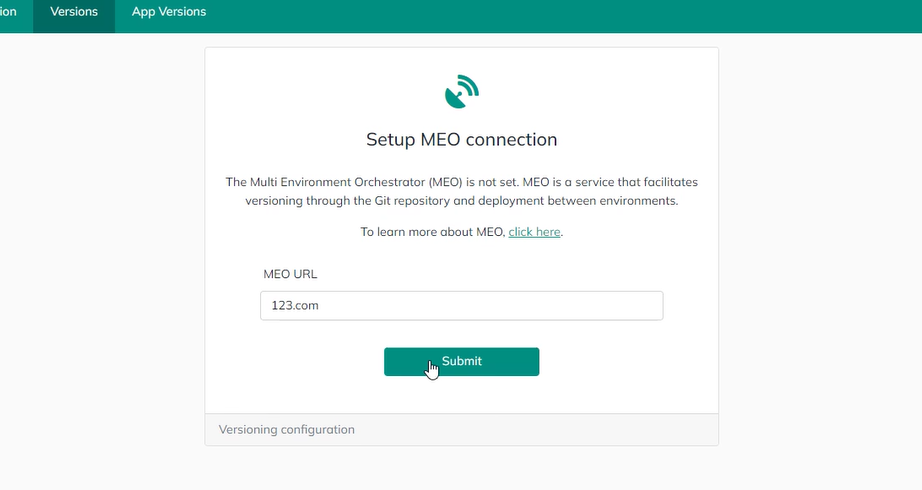
Check the IIS Manager for the MEO website that you have created in the MEO Prerequisites and Setup > IIS Site Setup section. Please enter your MEO Server URL and click Submit.
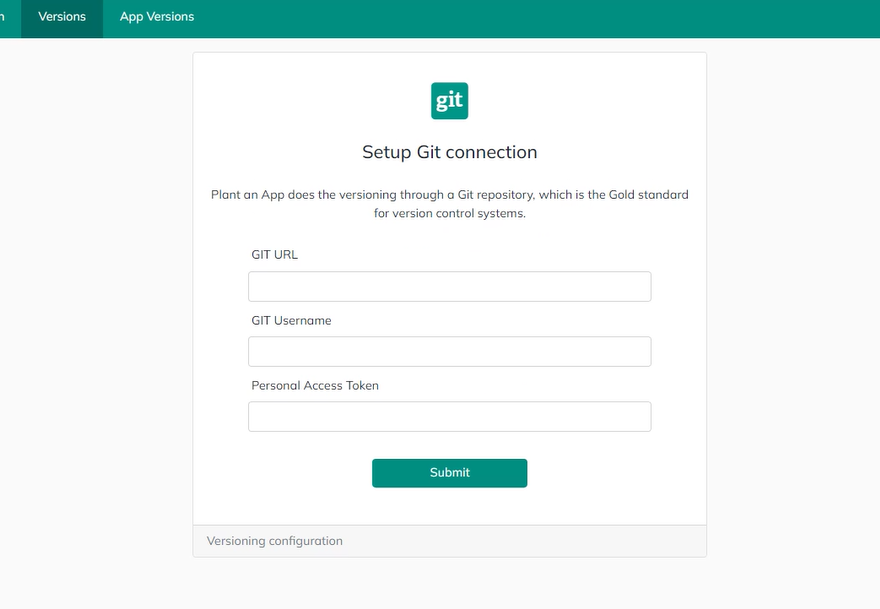
Once the connection to the MEO Server is established, you will be asked to provide your GIT/GitHub connection credentials:
- Your GIT URL
- GIT Username
- GIT PAT, or Personal Access Token
After having successfully logged into your GIT/GitHub account, an initial commit will be made. To understand the concept, please see here. Simply click the Initialize button.
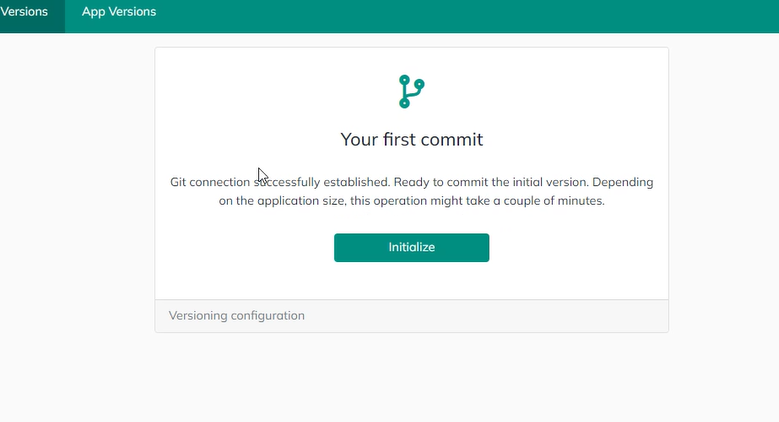
If the process is successful, you will be taken to the Version Control main console screen (see below).
Usage
Once the Setup and Configuration steps above are completed, Version Control is ready to use. Accessing it will bring you directly to the Version Control main console screen which contains three sections:
Version HistoryChangesIncluded In Version
Version History
This section lists the history of your commits along with various information about each one of them.
For each commit, you will be able to see the following parameters, listed in columns:
| Parameter | Description |
|---|---|
| Id | A unique random string that identifies each commit. |
| Title | Provided when submitting the commit, see the "Included In Version" section, below. |
| Details | Optional field, provided when submitting the commit, see the "Included In Version" section, below. |
| ComitterName | This is the GIT CommitterUsername; this parameter has a default value, but can also be edited if needed. Please see the "appsettings.override.json file configuration" section for more details. |
| CommitterEmail | This is the GIT CommitterEmail; this parameter has a default value, but can also be edited if needed. Please see the "appsettings.override.json file configuration" section for more details. |
| CommitDate | The date and time (of the server) when the commit was made. The format is "MM/DD/YYYY H:MM". |
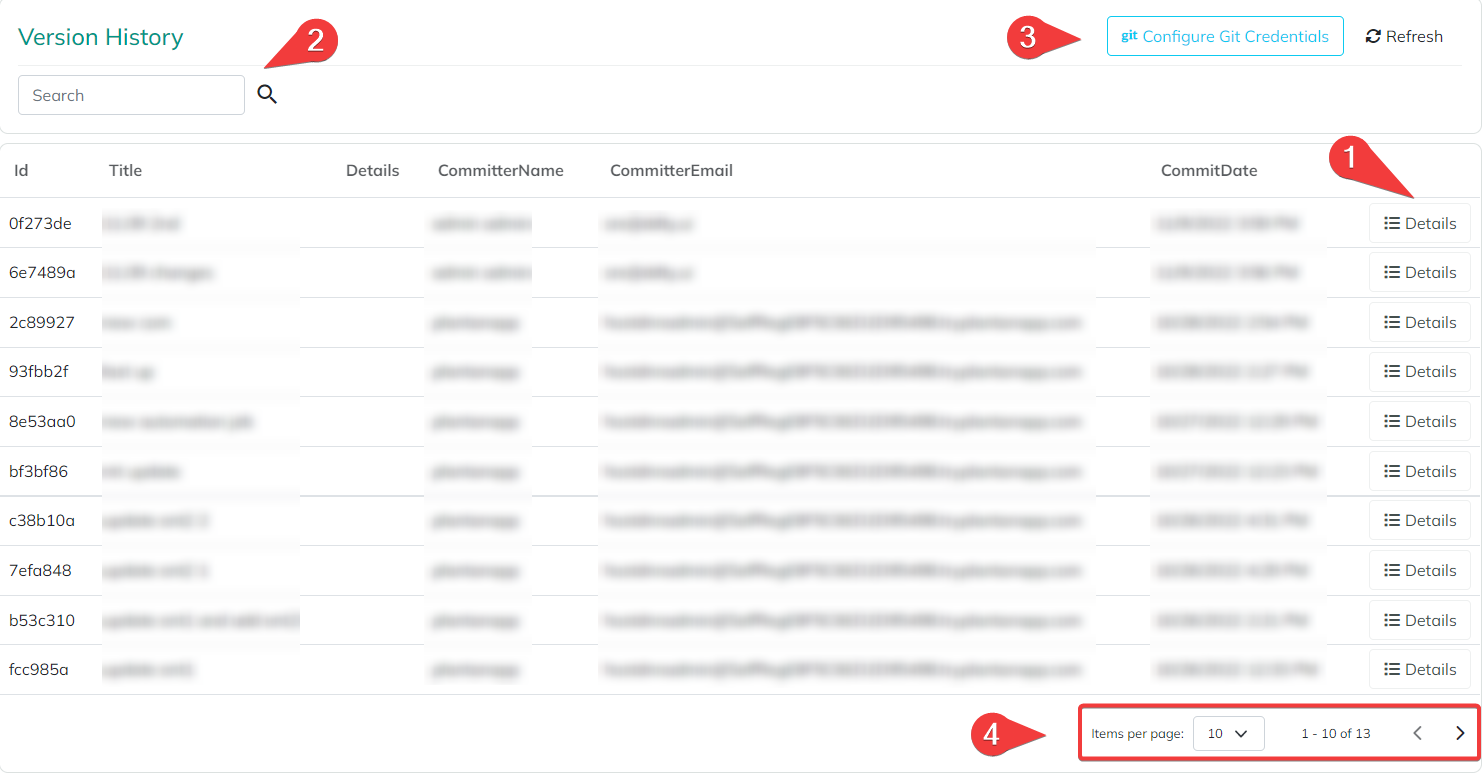
Additionally, you can:
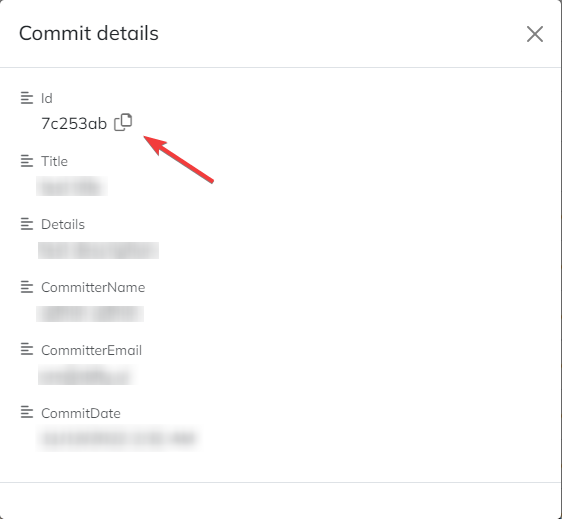
- Click the "Details" button ① for each separate commit to reveal a card with all the parameters for that particular commit. Note that you are able to copy each value by clicking the "Copy" symbol.
- Search your commits by Id or keywords in the Search box ②.
- Configure your GIT credentials ③ - GIT URL, GIT Username and GIT PAT.
- Navigate through the commit pages and set the number of commit items to be displayed by page ④.
Changes
In this section the changes since your last commit are listed and you can select them individually (or in mass) to be included in your commit.
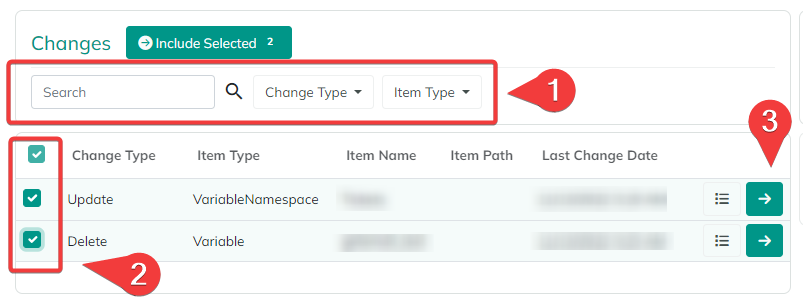
- The filters section ① allow you to look for a specific change according to a keyword or Id via the Search box, or to filter the displayed list of commits through the "Item Type" (type of object - variable, token, etc.) or "Change Type" (the type of action the object was subjected to) drop-down lists.
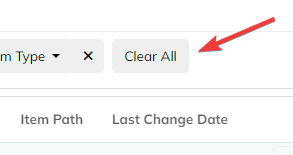
Note that each type from the list is individually selectable through a checkbox. If at least a filter is applied, a "Clear All" button will appear, allowing you to remove all filters in on click.
- Select ② the changes you want to include in the next commit by checking their corresponding box in the utmost left column. Alternatively, you can select all the boxes at once by checking the box atop the column.
- Include your changes to the commit by clicking their individual "Include" button ③ in the utmost right column. Alternatively, you can click the "Include Selected" button above the filters section; this will include all the selected changes to the commit at once.
Included In Version
This section composes the final version commit. It also allows you to remove changes from the commit.
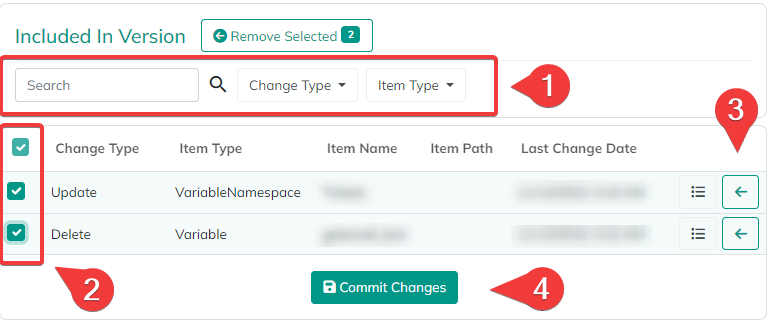
- The filters section ① allow you to look for a specific change according to a keyword or Id via the Search box, or to filter the displayed list of commits through the "Item Type" (type of object - variable, token, etc.) or "Change Type" (the type of action the object was subjected to) drop-down lists.
Note that each type from the list is individually selectable through a checkbox. If at least a filter is applied, a "Clear All" button will appear, allowing you to remove all filters in on click.
- Select ② the changes you want to remove from the next commit by checking their corresponding box in the utmost left column. Alternatively, you can select all the boxes at once by checking the box atop the column. Then, click the "Remove Selected" button above the filters section to remove all the selected changes.
You can also remove changes individually, by clicking their respective "Remove" button ③ in the utmost right column.
- When you are happy with the changes list to be included in the commit, click the "Commit Changes" button ④.
- The "Stage Form" window will appear, allowing you to enter the "Commit Title" (mandatory) and "Commit Description" (optional). When done, click the
Commitbutton.

- Finally, the "Committing" window will appear. You will be able to follow the stage of the operation via a progress bar.

Once the operation ends, you will be automatically taken back to the Version Control main console screen.