Forms 2.0 - Validate User Input
This page is preliminary and subject to change as Forms 2.0 continues to be developed.
This guide picks up where Create My First Form left off. That contact form accepts First Name, Last Name, Email Address, Subject, and Message, but doesn't check any of them. Here we'll add two kinds of validation: Field Validators for quick, automatic checks, and a conditional action on the button for custom rules a validator can't express.
Open the form for editing
There are two ways to get back into the Form Builder for a form that's already on a page:
- Put the page into edit mode and use the Manage option off the module's pencil icon.
- If the page uses the Page Builder theme, click its gear icon, then click (or middle-click, to open in a new tab) the form.
Add Field Validators
For each field, click it, scroll down to its Field Validators section, and Add Validation:
- First Name, Last Name, and Subject - add a Required Field validator.
- Email Address - add both a Required Field validator and an Email Address validator, so it must be filled in, and if filled in, must be a validly formatted email address.
- Message - leave it without a validator, so it stays optional.
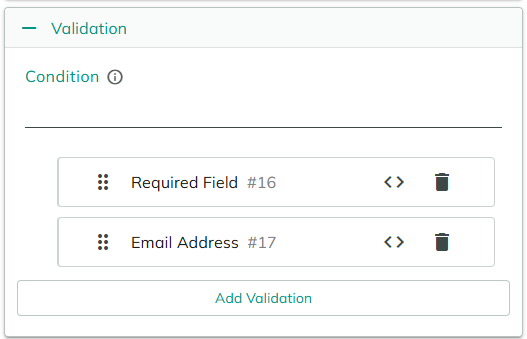
Click Save, then return to the live form and refresh it. The required fields now show an asterisk next to their label.
Field Validators run automatically. If any of them fail, clicking the Save button - or any button that triggers validation - won't run its actions: nothing saves or sends until the problem is fixed.
Try submitting the form without filling anything in - you'll see inline messages like "Last Name is required" and "Email Address is required," which clear as you fill in each field. Enter a malformed email address and you'll see "Invalid email address" instead.

Add a custom validation rule to the button
Field Validators are the first line of defense for straightforward checks like required fields or common formats. For custom logic they can't express, add a conditional action to the button instead. As an example, let's block a specific value - say, disallowing "Dale" as a first name:
- Click the Save button and go to its On Click Handler.
- Add Action and choose Display Error Message, under the Message category. Rename the action itself to something descriptive, like
Don't allow Dale. - Give the action a Condition so it only runs when the First Name field equals
Dale:[FirstName] == "Dale". - Set its Message to
Not Allowed.. - Drag this action to the top of the action list, above the Send Email and Display Message actions from Create My First Form.
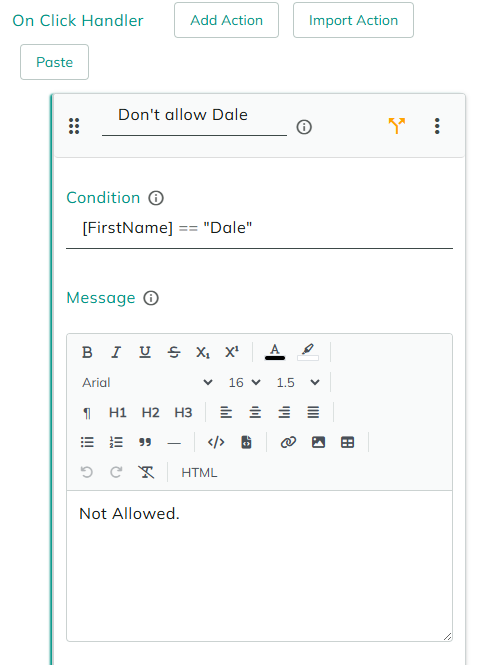
Because this action runs first, if its condition is true it displays the error message and stops every action after it from running - so the email is never sent and the success message is never shown.
Click Save, return to the live form, and refresh. Fill in the form with "Dale" as the first name (plus the rest of the required fields) and click Save - you'll get the "Not Allowed." error message instead of a successful submission.
Summary
- Field Validators attach directly to a field and run automatically before any validating button - use them for straightforward checks like required fields, email format, or other built-in validators.
- A conditional action on the button - such as Display Error Message with a Condition - handles custom rules that don't fit a validator. When its condition is true, it can show an error and stop the rest of the action stack from running.