Forms 2.0 - Populate a Dropdown from a Data Source
This page is preliminary and subject to change as Forms 2.0 continues to be developed.
This guide continues the contact form from Create My First Form and Validate User Input. Instead of a free-text Subject, we'll turn it into a Dropdown, and populate its list of options from a few different kinds of Data Source: a static Items List, Entity Records, and a SQL Query.
Replace the Subject field
There's no way to convert an existing field from one type to another in place - to change a field's type, delete it and add a new field of the type you want.
- Open the Form Builder and go to the Build tab.
- Click the existing Subject Text Box and delete it, then Save.
- Drag a Dropdown onto the Canvas in its place, and set its Label to
Subject. - Add a Required Field Field Validator to it, the same as the other required fields.
Populate it with a static Items List
A Dropdown's Data Source defaults to Items, with an Items List parameter below it. Hovering over that parameter shows exactly how to fill it in: one item per line, and if you want an item's displayed text and its underlying submitted value to differ, separate them with a pipe (|).
Fill in the Items List with:
Please Call|CALL
Make A Return|RETURN
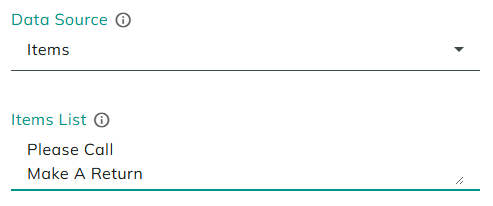
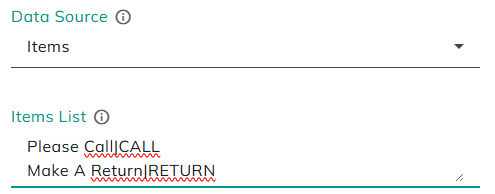
Save and refresh the live form - the dropdown now shows "Please Call" and "Make A Return" as options, and selecting either one satisfies the Required Field validator.
A Dropdown's displayed text and submitted value can differ. Here, selecting "Please Call" submits CALL, and "Make A Return" submits RETURN. Reference the display text with [Subject:Text] and the underlying value with [Subject:Value] ([Subject] alone yields the whole selected item).
Populate it from an Entity
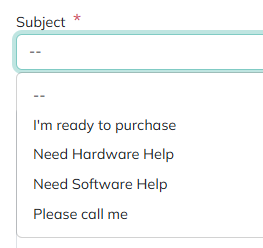
If the options you want already live in one of your site's Entities, set the Dropdown's Data Source to Entity Records instead, then choose which Entity to pull from - for example, an entity of subjects with records like "Need Software Help," "Need Hardware Help," "I'm ready to purchase," and "Please call me." You can also set an initial sort field and direction, for example sorting by Name, Ascending.
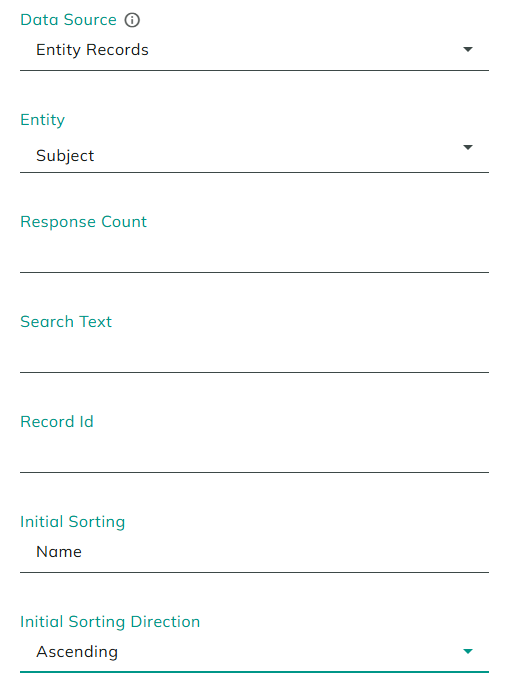
The dropdown now lists that Entity's records instead of a fixed list, in the order you specified.
Populate it from a SQL Query
Set the Data Source to SQL Query and provide a query that returns the values you want, for example:
select Name
from App.Subject
order by Name ASC
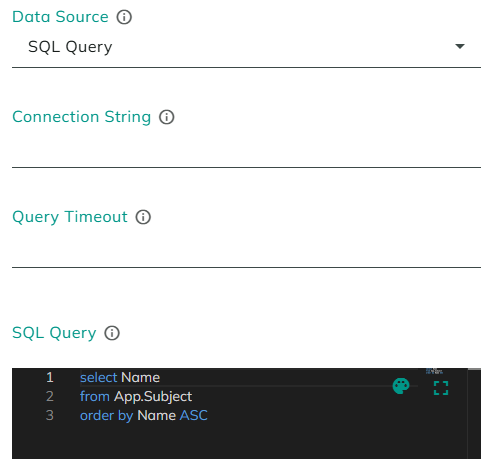
Save and refresh to confirm the dropdown reflects the query results. Changing the query's sort order (for example, to DESC) changes the dropdown's order the next time it loads - a quick way to confirm the SQL is really driving the list.
Other Data Sources
Items List, Entity Records, and SQL Query are just three of the available Data Sources - see Data Source on the Common Field Settings page for the fuller picture, including Server Request (JSON) (which pulls a JSON array from an external API in real time) and various always-available reference lists. Data Sources aren't limited to Dropdown, either - any field type that lets a user pick from a list of options uses the same mechanism.